My first electric ducted fan or EDF was a homebuilt model using depron. You can read about it here on RCPlaneviews. What I wanted to try this time was a molded foam EDF so the search was on.
There are a lot of choices out there. One day at the club field I was visiting with one of my flying buddies who had just gotten a T-28 from Nitroplanes. He was happy with the model and the service so I decided I’d give them a try. They have a lot of foam EDFs many of which seem to be perennially out of stock. I don’t know if they are that popular or just slow in arriving. In any case, they had several versions of the A-10 Warthog so together with a coupon code from a recent issue of FlyRC I had an RTF version on the way for about $125.
 |
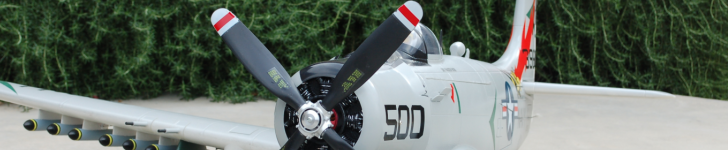
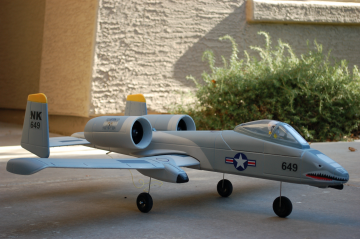
The A-10 arrived exactly when UPS said it would. Unpacking showed two issues with the wing. Both minor. The right wingtip was cracked and the USAF roundel decal was backward. As a 20 year Air Force pilot I noticed it right away and it bugs me. The roundels are just off. The A-10 has subdued markings besides the sharks teeth. The model comes with full color stars and bars. The crack was quickly fixed with a little foam-safe CA and kicker.
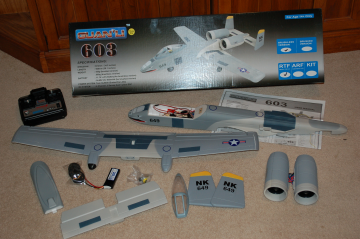
All the pieces were individually wrapped in cellophane and fit neatly into the carton. The transmitter was in its own compartment so it hadn’t bounced into anything during shipment. As with most RTFs the transmitter requires eight AA batteries. The A-10 comes with only ten structural pieces: fuselage, wing, horizontal stabilizer, two vertical stabilizers, canopy hatch, pilot, canopy and two motor nacelles. The hardware pack includes landing gear, wheels, wheel collets and bolts to mount both the horizontal stab and wing. The instructions are simply a large sheet of paper with the parts list, some photos and brief explanations of the assembly steps.
After carefully reviewing the instructions and testing the installed electronics I began the quick assembly. I tend to go pretty slowly on my projects but even with some breaks for photos I was done in just over an hour.
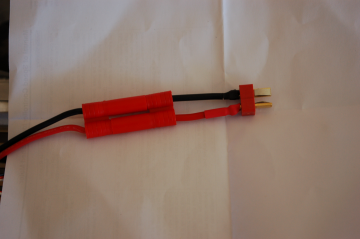 |
Before starting the assembly I connected the electrical components to make sure everything worked right and to center the servos. As with many models in RTF kits, the A-10 came with a lipo battery with connectors on it and the ESC that matched nothing I had. Fortunately, the leads on the battery were long so I cut the connector off and mounted a Dean’s plug end on it and plugged it into the ESC. I then mounted a Dean’s socket end on the battery. I now could use my other 1500mAh batteries with Dean’s plugs. With those tasks complete I moved on to assembly.
There were just a couple of things that needed to be glued. I used the supplied foam contact cement. Since I wasn’t in a rush to get to the field, the contact cement worked well. I applied a thin coat to the piece I was attaching and pushed it into place. I’d then pull the pieces apart and let them “catch some air” and push them back together to cure.
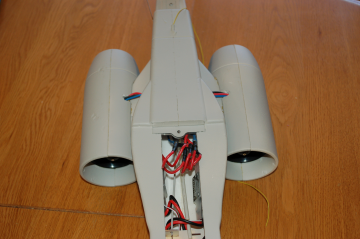
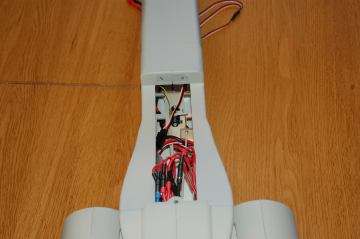
The motor nacelles connected easily. There is a molded cavity for a small wooden support that reminded me of wooden “biscuit” used in woodworking. Once placed, the three wires for the motors were fed into the fuselage. This proved to be one of the most time-consuming assembly steps. The wires needed to be fished from the rear of the fuselage. I used a piece of music wire with a bend in the end to snag each wire and then guide it forward while pushing the wire into the hole in the fuselage. When I got all three wires forward, I connected them to the respective ESC that comes mounted in the wing saddle area of the fuselage. The second set of wires was a little more difficult as there was even less room now that the wires from the first motor were in place. Nothing about this was hard but patience is the watchword. I kept reminding myself this is a foam model so as not to use too much pressure on any surface.
 |
 |
The wing was completed by mounting the aileron servo into the molded cavity. It fit tightly and was held in place with two small screws screwed into wood mounting support. The aileron torque rods were installed and the linkages attached to the servo. The rods had Z-bends and quick links for the torque rods on the threaded end of the control rod. They needed to be twisted on quite a bit to be short enough.
The two vertical stabilizers were glued to the ends of the horizontal stabilizer and elevator assembly using the same method as described above. I let them set for a while before mounting the completed assembly with the single bolt that attaches it to the rear fuselage. At this point I noticed a minor issue that repeated itself with the wing. The fit into the mounting spaces is tight. When the model was painted the pieces were just a bit too large. With a little sanding, the pieces were mounted with a nice tight fit with both the wing and horizontal stabilized held firmly in place with a nylon bolt.
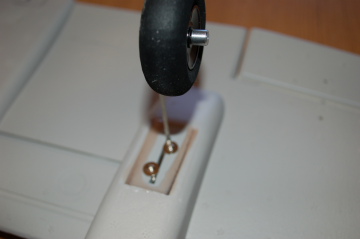
While the rear assembly was drying, I mounted the landing gear on the wing and fuselage. Wooden mounting plates were installed on the underside of the wing and two screws with wide heads held the main gears in place once they were fitted into the mounting holes. The nose gear proved a little more difficult. The gear strut slid through a hole in the fuselage. Once placed, two small irregularly shaped pieces of light ply were to be glued both top and bottom to complete the support. When I did that the gear bound and it required some sanding to allow the bends in the gear strut to clear the light ply supports. Once clear, the gear moved smoothly when activated by the nose gear steering servo in the nose.
 |
 |
One of the frustrating things about the instructions was that there was no mention of the plane’s CG. I scoured the instruction sheet and went on to the Nitroplanes’ web site to look. I also check the various forums all with no luck. Ultimately, I look at the CG on the GWS A-10 as it was similar in size and weight. I guessed that starting from there was a safe bet. That proved to be correct. With the battery installed balanced at 55mm from the wing’s leading edge which was right in the middle of the range for the GWS version at 50mm - 57mm.
 |
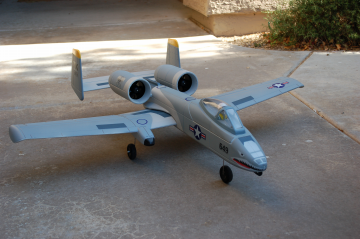 |
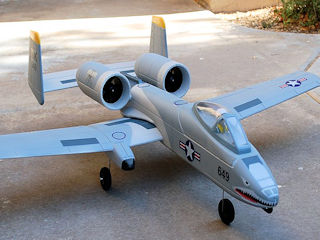
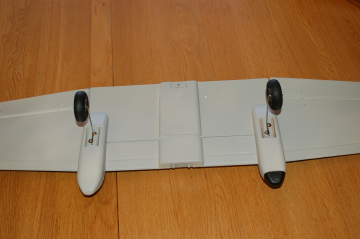
All in all the GuanLi A-10 from Nitroplanes was a good choice for me. The maiden flight went smoothly with just a couple of clicks of trim on the elevator and ailerons. It has plenty of power and a snappy control response. Now I just need more stick time.

![]()